

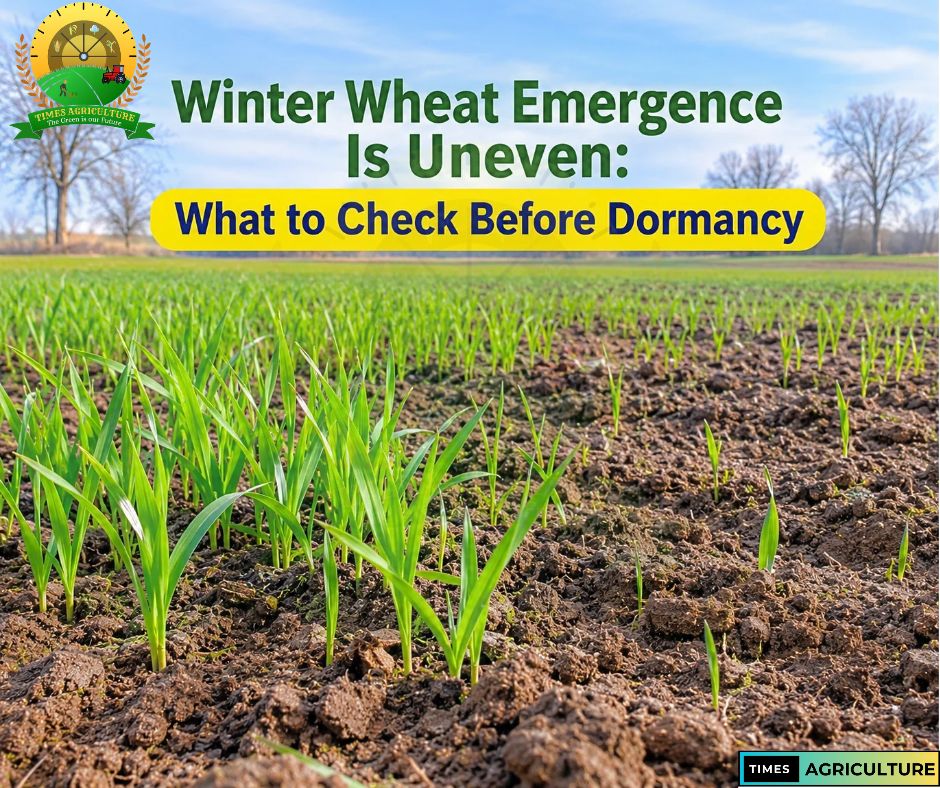
Winter wheat establishment is entering a critical checking period. The latest US figures show why a national progress number should never replace a field walk: in the USDA Crop Progress report released on 16 November 2026, 92% of the winter wheat crop had been planted and 82% had emerged by 15 November. The national condition table rated 53% of the crop good or excellent, while 13% was poor or very poor. The figures improved from the previous week, but state results still varied sharply.
Across Europe, the challenge is different from one region to another. The European Commission’s Joint Research Centre reported in its October 2026 crop monitoring bulletin that low soil moisture was holding back winter cereal establishment in parts of western, central and south-eastern Europe, while excessive rainfall had delayed sowing in the Baltic states and Finland. These are regional conditions, not a description of every European field.
For growers, the practical question is the same: has the crop established enough healthy plants to enter winter safely, and what is causing the thin or uneven patches? A careful assessment now is more useful than automatically increasing seed, fertiliser or irrigation. The steps below help identify the cause before choosing a response.
Why winter wheat emergence becomes uneven
Wheat seed needs both moisture and suitable temperature to germinate. The young shoot must then travel through the soil to reach daylight. A field can therefore have viable seed but still show a poor surface stand if the seed was placed too deep, the seed zone dried, the soil crusted, or waterlogging restricted oxygen around the seed and roots.
- Dry seed zones: Seed placed in dry soil may remain dormant or germinate only after rain. Moisture can also vary across a field, especially on slopes, light soils and compacted headlands.
- Excess water: Saturated soil contains less air. Seed and young roots may be short of oxygen, while machinery traffic on wet ground can make compaction worse.
- Uneven drilling depth: Shallow seed can dry quickly; deeply placed seed may take longer to emerge or fail to reach the surface. Check the actual depth rather than relying only on the drill setting.
- Clods, crusting and poor seed-to-soil contact: Large clods leave air gaps around seed, while a surface crust can physically obstruct shoots.
- Seed quality, pests and disease: Low germination, weak seed vigour, seed-borne disease, slugs, wireworms or other soil pests can reduce the number of healthy plants.
The Agriculture and Horticulture Development Board’s wheat establishment guide notes that germination and emergence depend on moisture and warmth, and that soil type, cultivation, seed treatment, pests and sowing depth all influence establishment. Its UK guidance gives around 4 cm as an optimum sowing depth in many situations, but local variety, soil, pest pressure and drilling recommendations must take priority.
Walk the field before deciding to re-sow
Start with a representative inspection. Do not judge the crop from the field entrance, headlands or one unusually good patch. Walk a W-shaped route or follow several diagonals, stopping in at least 10 areas that reflect the main soil types, slopes and drilling conditions. Record where plants are missing and whether the gaps follow drill rows, wheelings, wet hollows or changes in soil texture.
At each weak and strong area, carefully dig up a short section of row. Look for seed that has not imbibed, swollen seed that has not produced a shoot, seedlings trapped beneath a crust, discoloured roots, damaged coleoptiles or evidence of insects and slugs. Compare these findings with a nearby healthy patch. This simple comparison often identifies whether the problem is moisture, depth, soil structure, pests or seed health.
Measure plant population, not just visual colour
A thin-looking crop is not automatically a failed crop. Wheat can produce additional tillers and compensate for some gaps, particularly where plants are evenly distributed and have time to grow. Large bare patches are more serious because neighbouring plants cannot fill them as reliably and weeds may occupy the space.
One practical method described by AHDB is to use a 0.5 m by 0.5 m quadrat. Place it diagonally across the rows, count the plants inside it, and repeat in 10 representative parts of the field. Average the counts and multiply by four to estimate plants per square metre. If you do not have a quadrat, make a frame from four half-metre rods or use a row-length method with the drill row spacing recorded.
AHDB lists a benchmark of 70% of seeds sown becoming established and about 260 plants per square metre for its UK wheat guidance. Treat those as reference points, not universal pass-or-fail limits. The right population depends on sowing date, seed rate, variety, row spacing, soil, weed pressure, local climate and the crop’s ability to tiller. Compare counts with your local extension service’s target for the variety and sowing window.
Keep a simple field record: location, plant count, soil moisture, drilling depth, seed lot, date, visible damage and photographs taken from the same points. Repeat the count after a suitable interval if emergence is still progressing. This prevents a decision being made too early on a crop that is simply emerging slowly in cool conditions.
What to do in dry or drought-affected seedbeds
Where the seed zone is dry, first check whether the seed is still firm and viable and whether moisture is present a little deeper in the profile. Do not assume that every missing row needs more water: the correct response depends on soil texture, available irrigation, rainfall prospects, field drainage and the crop’s growth stage.
- Check soil moisture at seed depth in both good and poor patches.
- Look for shallow seed that may have dried after a small shower, and for seed placed too deep to emerge promptly.
- Where irrigation is available and locally appropriate, use a measured application that wets the seed zone without causing runoff, ponding or nutrient movement.
- Do not irrigate simply to make the surface look wet. Confirm that water can reach the rooting zone and that the field can drain safely.
- After rain or irrigation, revisit the same marked locations and check whether new seedlings appear.
On dryland farms, preserve remaining soil moisture by avoiding unnecessary cultivation and traffic. If the crop was drilled into marginal moisture, wait for the next suitable weather window before deciding whether re-sowing is justified. Replanting costs seed and fuel and can create a second crop with a different maturity pattern, so base the decision on actual stand counts and local agronomic advice.
What to do in wet, waterlogged or compacted fields
In wet fields, patience can prevent a second problem. Avoid driving heavy machinery over saturated soil: wheelings and smearing can restrict drainage and root growth long after the surface dries. Check whether field drains, outlets and ditches are clear where you are responsible for maintaining them, and identify whether water is standing because of blocked drainage, a compacted layer or a natural low point.
Do not try to repair a wet seedbed with aggressive cultivation. Working soil when it is plastic can create clods and compacted layers that are difficult to correct. Wait until the soil is friable enough to work, and seek local advice before subsoiling or deep cultivation because the wrong operation or timing can increase damage and cost.
In fields with repeated waterlogging, map the affected zones. Consider whether future field operations, controlled traffic, drainage maintenance, soil organic matter and rotation choices could reduce the risk. The best long-term solution is usually to address the cause of poor drainage rather than repeatedly patching the crop after heavy rain.
Check weeds, pests and seedling health
Thin stands give weeds more room and light. Scout the crop for early grass weeds and broadleaf weeds, but identify them correctly before choosing a herbicide. Product approvals, crop growth stages, weather restrictions and resistance risks differ between countries. Follow the label and local integrated weed-management guidance; never apply a product simply because a neighbouring farm used it.
Inspect seedlings for chewed leaves, missing plants, hollowed or damaged seed and discoloured roots. Slugs and wireworms can be important in some rotations and seedbeds, while seed-borne fungi and poor seed vigour can produce weak or patchy emergence. Use the diagnosis to guide any action. A foliar spray cannot restore seed that has rotted or a shoot that cannot reach the surface.
For future crops, use certified seed with a known germination result, calibrate the drill, maintain even seed depth and apply only locally approved seed treatments when justified. Seed treatments are preventive tools; they are not a substitute for good seed quality, drainage or a well-prepared seedbed.
Avoid correcting a thin stand with excessive nitrogen
It can be tempting to apply extra nitrogen to make a weak crop look greener. That is not a reliable fix. Nitrogen will not correct missing plants, poor drainage, seed rot or a physical emergence barrier. Excessive or poorly timed nitrogen can increase costs, raise lodging risk and create nutrient losses.
Wheat may compensate for a lower plant population by producing more tillers, but this depends on the variety, sowing date, plant distribution, temperature and remaining growing time. AHDB notes that tillering can help wheat compensate for uneven establishment, while also warning that high plant densities can increase lodging risk. Use local crop assessments and soil or tissue information before changing a fertiliser plan.
Regional guidance matters
The current reports highlight why a single recommendation cannot fit every winter cereal region. In the United States, the USDA’s 15 November survey showed 82% of winter wheat emerged nationally, but Oklahoma was at 66% and Arkansas at 45%, compared with 79% and 67% respectively in the 2021–2025 averages. In Europe, the JRC identified both moisture deficits and excess rainfall, depending on the region.
For Pakistan, India and other South Asian wheat areas, local Rabi sowing calendars, varieties, irrigation access and temperature patterns should guide decisions. Advice designed for a UK or US winter-dormancy system should not be copied directly into a South Asian production system. Consult the relevant agriculture department, research institute or extension officer for local seed rates, sowing depth, irrigation and fertiliser recommendations.
Conclusion: diagnose first, then act
Good winter wheat management begins with knowing what is actually happening below and above the soil surface. Walk the field, dig up weak and healthy areas, count plants in representative locations, and record moisture, depth, drainage and damage. Allow for delayed emergence where seed remains viable, protect wet soils from traffic, and avoid unnecessary nitrogen or re-sowing until the stand has been assessed.
Winter crop establishment is uneven across several important production regions, but the right response is field-specific. A measured diagnosis now gives growers a better chance of protecting plant populations, reducing wasted inputs and carrying a more uniform crop into the next growth stage.